This page is for reference, for people who have a pretty good idea of much of the matters involved already.
It is a cut down version of a 'Guide to Using WS2812 Smart LEDs / NeoPixels' page which I hope will get a novice from knowing "nothing" to being able to use these very cool devices.

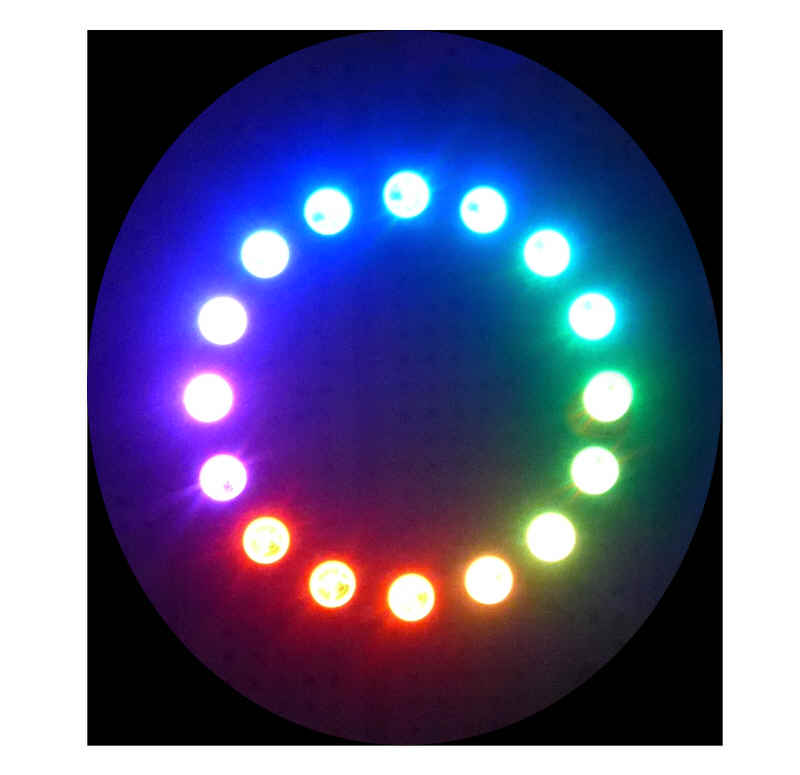
Pololu sells a ring of 16 for $10. Sparkfun will sell you strips of various specifications and lengths, e.g. a 5m weatherproofed strip with 300 WS2812s? ($119, sigh).
One of the Adafruit tutorials says...
IMPORTANT: To reduce NeoPixel burnout risk, add
1000 uF capacitor across pixel power leads,
add 300 - 500 Ohm resistor on first pixel's data
input and minimize distance between Arduino and
first pixel.  Avoid connecting on a live circuit
...if you must, connect GND first.
I am going to use "LEDs" quite often to refer to WS2812s. Of course, each WS2812 contains three LEDs, but usually when I say "the LED", I will be meaning "the module containing a red, a blue and a green LED".
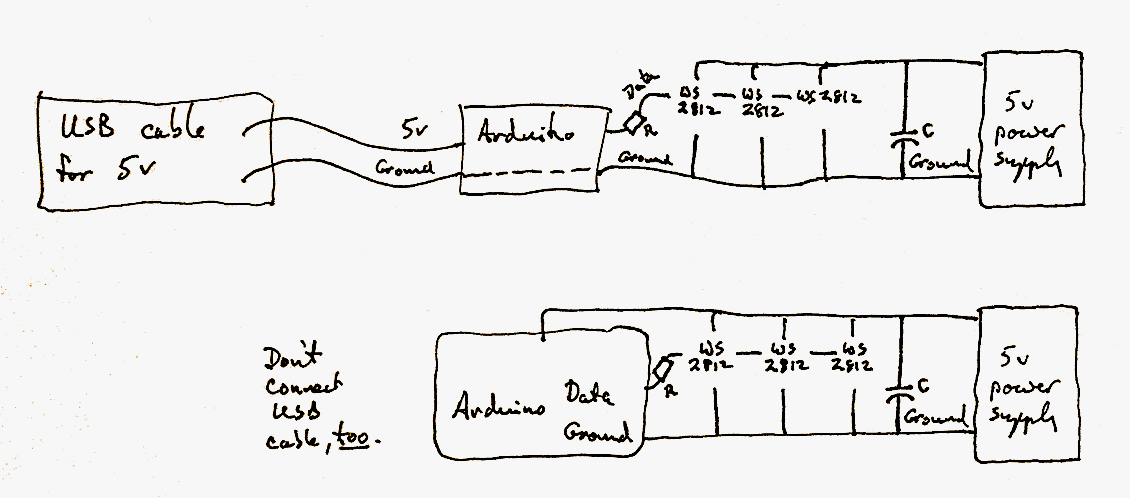
To hook your computer up to a string of WS2812s, you only need three wires...
A string of the devices, even one with "only" 16 of them, needs a source of 5v capable of delivering significant current. A 16 LED string can draw 800mA.
Not a "big problem"... but don't try to run the string off of the 5v made on an Arduino which has it's own voltage regulator circuits.
The following shows two alternative hook-ups. Do not connect the Arduino both to 5v via the USB cable and via the Vcc pin.
The capacitor, C, and resistor, R, are the ones mentioned in the highlighted warning at the top of this essay.

Before you use the WS2812s, you need to install the Adafruit_NeoPixel library in your Arduino programming environment, your IDE.
Go to the github LED-strip-Arduino page, and click on the "Download .zip" button (over at right, Jan 2018). Don't be alarmed by the "Pololu" on the page if you are using WS2812 (or WS2811) smart LEDs from someplace else.
Install the library in the usual way.
Once you have done the setup describe above, the following should work...
//SmartLEDSimple1
#include <Adafruit_NeoPixel.h>

#define bLedSmartLEDStripPin 6//no ; here

Adafruit_NeoPixel SmartLEDStrip=
         Adafruit_NeoPixel(16,
         bLedSmartLEDStripPin,
         NEO_GRB + NEO_KHZ800);

void setup() {
  SmartLEDStrip.begin();
  SmartLEDStrip.show(); // Initialize all pixels to 'off'
}

void loop() {
  SmartLEDStrip.setPixelColor(0,SmartLEDStrip.Color(255,0,0));
  SmartLEDStrip.setPixelColor(1,SmartLEDStrip.Color(255,0,0));
  SmartLEDStrip.setPixelColor(2,SmartLEDStrip.Color(0,255,0));
  SmartLEDStrip.setPixelColor(3,SmartLEDStrip.Color(0,0,255));
  SmartLEDStrip.setPixelColor(4,SmartLEDStrip.Color(0,0,255));
  SmartLEDStrip.setPixelColor(5,SmartLEDStrip.Color(0,0,255));
  SmartLEDStrip.show();//****
  delay(1000);
}
The above is merely the main points from a much longer page which goes into detail, and explains things. Click here for my full tutorial on Smart LEDs/ WS2812s/ Neopixels.
![]() Page tested for compliance with INDUSTRY (not MS-only) standards, using the free, publicly accessible validator at validator.w3.org. Mostly passes. There were two "unknown attributes" in Google+ button code, and two further "wrong" things in the Google Translate code. Sigh.
Page tested for compliance with INDUSTRY (not MS-only) standards, using the free, publicly accessible validator at validator.w3.org. Mostly passes. There were two "unknown attributes" in Google+ button code, and two further "wrong" things in the Google Translate code. Sigh.
....... P a g e . . . E n d s .....